When working with Jekyll and Siteleaf, you typically have 3 distinct environments to help you code, preview, and publish your site:
-
development- this is your local machine where theme development takes place. Runjekyll serveand your site will be accessible athttp://localhost:4000. -
staging- sites on paid plans come with preview functionality. Hit the “Generate preview” button in Siteleaf, and your site will be built with a unique URL without affecting your live site. This URL is shareable, so you can send it to colleagues outside of Siteleaf for feedback or proofreading. -
production- where your final website is generated and hosted. This could be GitHub Pages, Amazon S3, Rackspace Cloud Files, or any host that supports (S)FTP (DigitalOcean, MediaTemple, etc).
Starting today, Siteleaf will now set the {{ jekyll.environment }} variable to one of the environments above (previously both preview and publish used production).
This allows you to set up conditional code in your theme to render content or add functionality based on the current environment. For example you may want to alter image processing, insert a message, disable analytics, or even conduct user testing in one of your environments.
Example 1: Client feedback on staging

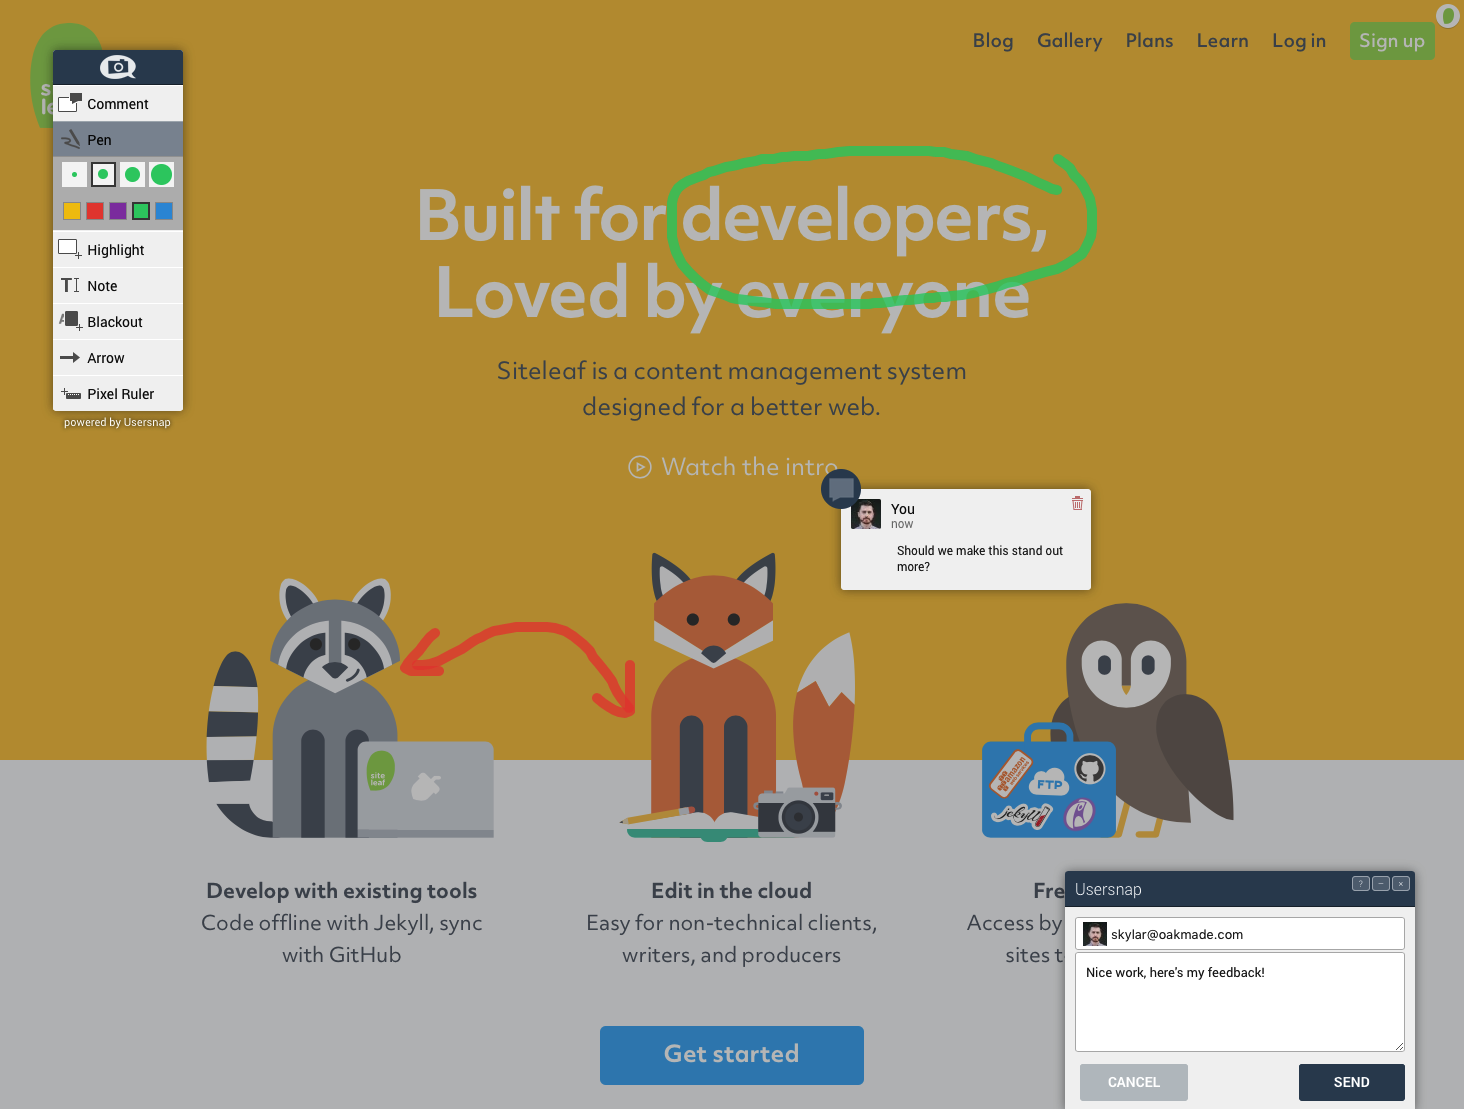
Let’s say we are working with a client on a new website. To help them provide constructive feedback during development, we can add a feedback widget to our site and enable it only on the staging (preview) environment.
There are many options for feedback widgets including Usersnap and WebEngage, but we’ll go with Usersnap since it supports annotated screenshots and can pipe responses right into our Slack channel.
We can simply wrap the embed code provided by Usersnap around a Liquid conditional to check if jeyll.environment is equal to staging:
{% if jekyll.environment == 'staging' %}
  <script type="text/javascript">
  (function() {
  var s = document.createElement("script");
  s.type = "text/javascript";
  s.async = true;
  s.src = '//api.usersnap.com/load/'+
          'YOUR-TOKEN.js';
  var x = document.getElementsByTagName('script')[0];
  x.parentNode.insertBefore(s, x);
  })();
  </script>
{% endif %}
Example 2: Production-only analytics
To keep our Google Analytics clean of test traffic, we can wrap the tracking code around a similar conditional checking for the production environment.
For good measure, we could also move the property ID to a site metadata field called {{ site.google_analytics }} in case we later need to change it.
{% if jekyll.environment == 'production' %}
  <script type="text/javascript">
    (function(i,s,o,g,r,a,m){i['GoogleAnalyticsObject']=r;i[r]=i[r]||function(){
    (i[r].q=i[r].q||[]).push(arguments)},i[r].l=1*new Date();a=s.createElement(o),
    m=s.getElementsByTagName(o)[0];a.async=1;a.src=g;m.parentNode.insertBefore(a,m)
    })(window,document,'script','//www.google-analytics.com/analytics.js','ga');
    ga('create', '{{ site.google_analytics }}', 'auto');
    ga('send', 'pageview');
  </script>
{% endif %}
Example 3: E-commerce testing
Snipcart is a simple way to add e-commerce to Siteleaf sites. It comes with both a Live and Test mode, so you can create sample purchases and test the checkout process in isolation. Each mode has a unique API key, so we can use jekyll.environment to apply the Live code to production and the Test code in staging and development.
{% if jekyll.environment == 'production' %}
  {% assign snipcart_api_key = 'LIVE-API-KEY' %}
{% else %}
  {% assign snipcart_api_key = 'TEST-API-KEY' %}
{% endif %}

<script
  src="https://cdn.snipcart.com/scripts/2.0/snipcart.js"
  data-api-key="{{ snipcart_api_key }}"
  id="snipcart">
</script>
Testing environments
To test this functionality locally and ensure your conditionals work as intended, set JEKYLL_ENV when running jekyll serve. For example we could see how production would render:
$ JEKYLL_ENV=production bundle exec jekyll serve